To save the hassle of watering plants manually, gardeners often opt for alternative methods. One of the most popular being a hydroponic drip system. In this post, we will explore what it takes to have successful hydroponic drip systems for your home garden.
*This post contains compensated links. Find more info in my DISCLAIMER. As an Amazon Associate, I earn from qualifying purchases.
Want to start a hydroponic garden at home easily? Check out our recommendations for Best Hydroponics Starter Kits for Beginners.
What Is A Hydroponic Drip System?
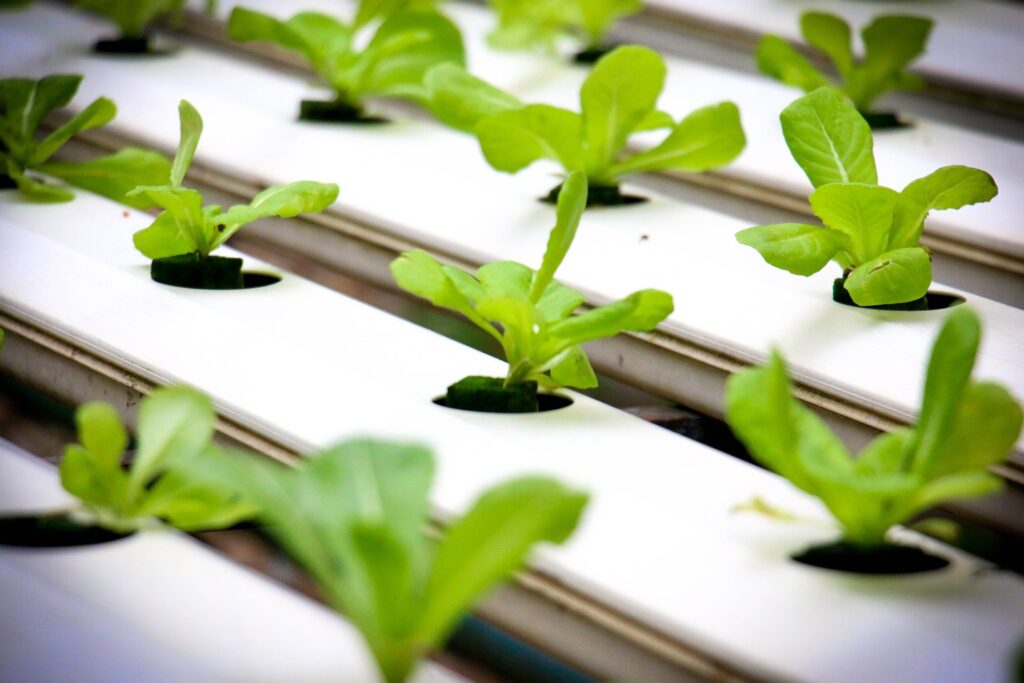
A hydroponic drip system sometimes referred to as a micro-irrigation, or trickle system regularly uses a pump to feed plants with water and nutrients. Just one of the many different types of hydroponic systems, this system uses a network of feeder lines and small emitters to deliver the important nutrient solution.
This system is essential for larger plants that require a lot of root space. This is because less water is required to flood the system. Additionally, you can easily run drip lines over longer spaces. This is the reason why commercial operations choose drip hydroponic systems over other systems.
The use of drip hydroponic systems is so popular, and it is the most efficient method as it adapts to the soilless media. Using many media to grow plants helps retain more moisture than using fewer media.
Drip hydroponics is also ideal in vertical farming. In a vertical farming setup, water is pumped to the top of the system. From there, the system lets gravity to the rest of the work to water the plants.
Types Of Hydroponic Drip Systems
There are two types of hydroponic drip systems, namely recovery/ recirculating and non-recovery/ non-recirculating.
Recovery Vs Recirculating Drip Systems
Home growers commonly use this type. As the name suggests, this system cycles or reuses the nutrient solution after wetting the plant roots and getting back to the reservoir. The nutrient solution is recirculated in the system and used as many times as possible.
The system is also called recovery because the used nutrient solution is recovered from being used for recirculation.
The nutrient solution in this system can change both the nutrient level strengths and pH because the plants absorb the nutrients in the water when it circulates continuously. This calls for frequent check and adjustment of pH levels as needed and regular change of nutrient solution to ensure a balance.
Non-Recovery VS Non-Recirculating Drip Systems
This is the most common drip system for commercial growers. The nutrient solution in this system requires less maintenance because it is never recycled back to the reservoir. This means that you can fill your reservoir with a balanced and PH-adjusted solution, and it cannot change; hence, you will need not monitor frequently.
However, you need to ensure that you keep the water in the reservoir moving slowly to prevent the heavier mineral elements from settling at the bottom. This will ensure the solution remains balanced in PH.
The excess water in this system is not sent back to the reservoir. Instead, it is removed as wastewater. It may sound like there is a waste of water and nutrients by failing to recover or reuse it, but surprisingly, there is less wastage. Growers do this by timing the watering cycles, using cycle timers to adjust watering times as needed.
Watering is done long enough to wet the growing media. This nutrient solution is absorbed by the plant roots and held in the media; thus, very little (if any) runs off. They also flush the growing medium periodically using plain fresh water to prevent nutrient build-up in the medium.
DIY Drip System Hydroponics
A DIY hydroponics project might seem impossible to build, but with the right materials and a little know-how, it can be done. To construct a drip hydroponic system, there are several factors to be considered such as the types of crops to be grown and the location. It should be located in enclosed structures such as greenhouses. The floor should be level so that there is an even supply of water and nutrients.
When constructed outdoors, drip irrigation hydroponics should be protected from strong winds and perform frequent water checks to replace the water lost due to evaporation. You can shift the system indoors during cold temperatures. Add grow lights to your indoor space to give supplementary lighting to your crops.
Materials
The hydroponic system comprises a 50-gallon nutrient tank, PVC-made stand and trellis, 6″ PVC pipe, a manifold, and a pump.
Installation
Constructing a hydroponic drip system design is a simple and DIY process.
The nutrient tank is placed under the table having 6″ PVC growing tubes. The pump is placed in the tank to deliver nutrients to plants through a manifold of plastic tubes and PVC pipes.
All the growing tubes have drain pipes connected to lead back to the tank. The manifold is placed on top of the pipes to deliver pressurized water to the tubes.
To deliver nutrients to plants, water moves through the PVC pipes and manifold and gets inside the small tubes found inside the larger growing tubes.
Nutrient tubes have tiny holes in them. The nutrients get out through the holes and get to the plant roots. Additionally, air bubbles come out from the jet of water to supply adequate oxygen to the plants.
Procedure
Add water to the 50-gallon tank and add nutrients as recommended by the nutrients’ labels and then turn on the pump to run for half an hour to mix the nutrients.
Add the healthiest plants or seedlings to the holes. Ensure the roots are free from any soil and dirt that may clog the tiny holes. To remove the dirt, immerse the plants in lukewarm water. Too hot or too cold water may put the plants in a shocking state in the nutrient tubes.
Pull the roots to the base of the planting cup and then add clay pebbles to provide support to the plants so that they stay upright. Though hard, clay pebbles are light hence do not damage the roots.
Tie the plants to the trellis using strings and plant clips. The strings provide support for vertical growth. The strings are then loosely tied to the trellis at the top. The clips and strings are then attached to the base of every plant.
Turn the pump on and ensure you monitor the water and nutrient levels frequently because evaporation may occur. It is also necessary to make sure the tank doesn’t dry out to prevent the pump from burning up.
The rest of the work is to monitor plant growth. There is a fast growth because water and nutrients are highly available. You should monitor frequently to ensure there are no pest and disease attacks.
Can I Buy A Hydroponic Drip System Kit?
Hydroponic drip system kits are helpful when it comes to lifting. They can perform keeping the light on a timer and automatic watering. Other kits come with growing media and guides on how to take care of the plants, while others have a pH adjuster because tap water may have a high pH for growth.
FAQs – Hydroponic Drip Systems
Most hydroponic drip systems cost between $400-$1000. The actual price is determined by the size and quality of the drip system in question.
As the name gives away, a hydroponic drip system slowly and consistently drips nutrient-rich water over the plants. The water the system uses comes from the base where the roots of the plants are submerged into.